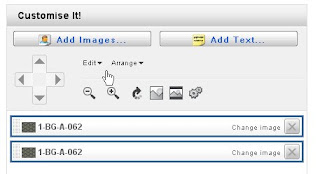
 1. Start out as usual by adding your image, then cilick "edit" then "select all" then, when they are all selected, click the X on one of the images (not the image itself, but from the list in the box) and delete all the images.
2. Then add one image and resize it as big as you want.
I then move that first image to the bottom of the tie.
3. Next click "edit" ..."Copy", Then "edit" ... "Paste". and then move the pasted image up and position it so the patterns line up perfectly.
4. Once you have your two or three or four images lined up on the tie, you can click on "edit" "select all" which allows you to re-size or move all the images at once.
Most of my ties have three large images vertically. Mine are not seamless images so I have to move them till the patterns line up. Try as much as possible to use the arrows to move them so they don't get out of wack. But sometimes you have to nudge the image just a tiny bit by hand.
Once you have that first tie made, instead of starting from scratch each time, just customize the original one by selecting all the images, then click on "change image" (on any of the image links) this will change all the images at once to your new image. Then all you have to do is make sure they are all lined up properly.


No comments:
Post a Comment
Note: Only a member of this blog may post a comment.